How to Use
The Google Docs Native Features
You can use the following list native features of the Google Docs to build your content for generating reStructuredText format.
- Paragraph heading and indentation
- Bold, Italic, subscript and superscript
- List and numbered list
- Table
- Image and chart
- Footnote, hyperlink and bookmark
- Table of contents (links to bookmarks and headings)
- Special characters and CKJ full-width characters
- Horizontal line
Note
A hyperlink will be opened in a new window(tab) if its URL is of format “scheme://…”, like http://, https://, etc.
Inline Markups
Some inline reStructuredText markups can be used directly in the document. The table below shows the usage example of these inline markups.
| In Google Docs document | Rendered in HTML page |
|---|---|
| A `single back-quote` | A single back-quote |
| A ``double back-quote`` | A double back-quote |
| A |replacement| markup | A replaced markup |
That is converted from the source content in document:
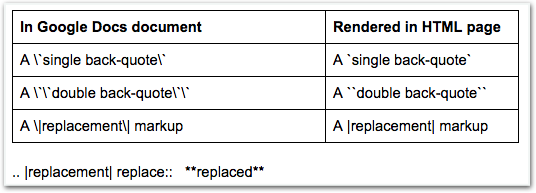
Please noted that if you manually put a substitution markup, you got to provide correct replacement markup manually too. Otherwise, the sphinx parser will raise exception.
Table
The Google Docs native table can be converted to reStructuredText table. One thing must mention is that, if you want to generate header rows in the generated reStructuredText table, you have to make all text in the header rows to be bold.
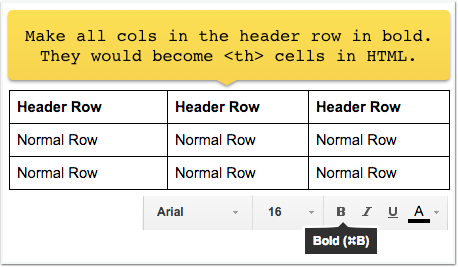
This is the rendered table of the above content.
| Header Row | Header Row | Header Row |
|---|---|---|
| Normal Row | Normal Row | Normal Row |
| Normal Row | Normal Row | Normal Row |
Hint
You can set background-color for header rows by assign CSS in the /docs/static/theme_overrides.css. For example:
- .wy-table-responsive table th {
- background-color: #f0f0f0;
}
Image
Images and charts in the Google Docs document are able to be converted to the generated reStructuredText file bundles. Here is the naming rules:
- A folder named “static” will be created if necessary in the same folder of the document.
- All the images in the document will be stored in the “static” folder in PNG format.
- The image name is the document name + underscore + sequence number + ‘.png’
Images will be re-generated if “Commit images” was checked. That is, the mapping between image content and image name might not be constant.
Warning
For CKJ users: (繁體中文、简体中文、한국어、日本語)
English document name is strongly suggested for naming your documents. Especially those documents with images because an image got pathname from its hosting document. By naming document in English, it would reduce the risk of parsing failure in the readthedocs.org.
Note
Currently, it seems the sphinx parser has problem on parsing :align: of an image markup, so image horizontal alignment is not supported yet.
Add-ons Menu Item of GGeditor
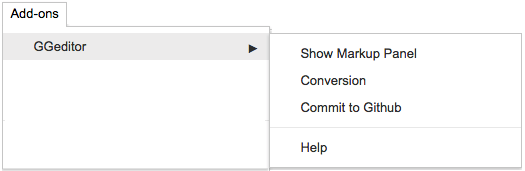
You can access the following features from the add-on menu item of GGeditor.
Markup Panel
The “Show Markup Panel” helps you to insert special markups, to see the converted content in reStructuredText, or to download the generated files.
Admonitions
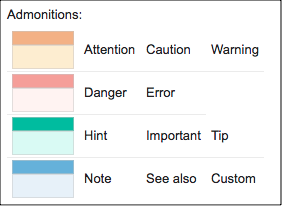
Admonition is something like this:
Attention
Here is the content of this attention
The GGeditor try to set the look-and-feel of admonitions to be as close as possible to what they are in the readthedocs.org (RTD). There are 4 kinds of layout for 10 types of admonitions. Please click on the admonition name to insert them into your document.
Custom Admonition
The “custom” at lower-right of the admonitions panel is a special feature. It inserts a template of admonition. In the diagram below, the left side is the template and you should change its title to whatever you want. The GGeditor will convert it to native markup of reStructuredText.

It renders like this:
Release Note
(content of Change-me)
Directives
Directive is the generic form of admonition and many other reST Markups.
Generic Directive
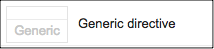
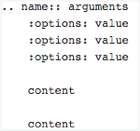
Generic directivecan be used for all kinds of reST directive. It will give you a table as shown below, you should replace all the placeholder to fit your needs.
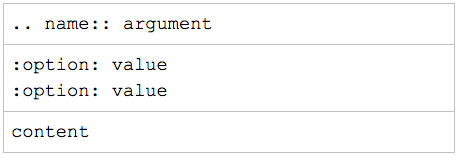
The following table is an example of the directive toctree.
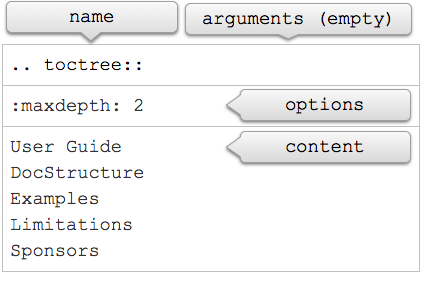
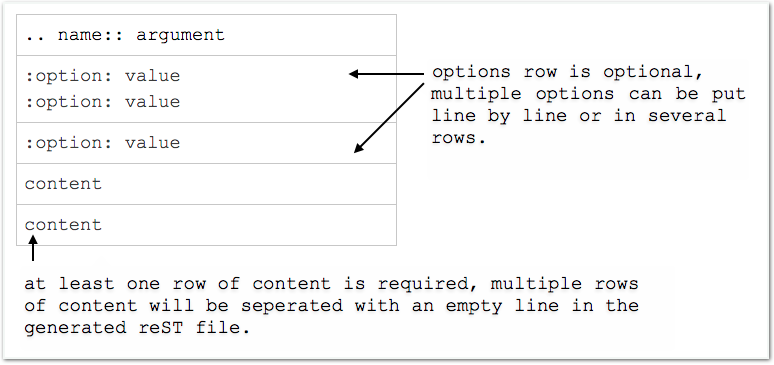
Please be noted “name” and “content” are required for a directive, arguments and options are optional. If there are no options, the content can be in the 2nd row. If there is more than one options, these options should be put line by line in 2nd row, or row by row. See the diagram below for illustration.
This is the reST generated from the above table.
You have to replace the name and content for your own purpose. One of the usage is to create customized admonition. The following directive table will create a And, by the way… dialog for you.

Below is how it is rendered in the web page.
And, by the way…
Here is your content
Code
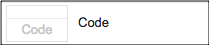
code is for holding sample codes.

The content in a code directive cannot be in bold or italic. Neither hyperlinks and images.
You can highlight your code by giving a language name after the ..code::, like this: (there is a space in front of “python”)

It is rendered like this:
#!/usr/bin/env python

"""
Twisted moved the C{twisted} hierarchy to the C{src} hierarchy, but C{git}
doesn't know how to track moves of directories, only files.  Therefore any
files added in branches after this move will be added into ./twisted/ and need
to be moved over into
"""

import os
from twisted.python.filepath import FilePath

here = FilePath(__file__).parent().parent()
fromPath = here.child("twisted")
toPath = here.child("src")

for fn in fromPath.walk():
    if fn.isfile():
        os.system("git mv {it} src/{it}"
                  .format(it="/".join(fn.segmentsFrom(here))))

os.system('git clean -fd')
Code with line number

This will insert a “code-block” directive. This feature render the given content with line numbers. The “:linenos” option should not be removed. Because the “code-block” should have an argument for programming language of the given content, a placeholder “python” has been appended as default. This argument can be replaced but shall not been removed.

1 2 3 4 5 6 7 8 9 10 11 12 13 14 15 16 17 18 19 20 21 22 | #!/usr/bin/env python
"""
Twisted moved the C{twisted} hierarchy to the C{src} hierarchy, but C{git}
doesn't know how to track moves of directories, only files. Therefore any
files added in branches after this move will be added into ./twisted/ and need
to be moved over into
"""
import os
from twisted.python.filepath import FilePath
here = FilePath(__file__).parent().parent()
fromPath = here.child("twisted")
toPath = here.child("src")
for fn in fromPath.walk():
if fn.isfile():
os.system("git mv {it} src/{it}"
.format(it="/".join(fn.segmentsFrom(here))))
os.system('git clean -fd')
|
Table of Contents
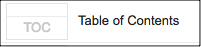
The Table of Contents will insert a sphinx toctree, aka cross-document table of contents to the cursor position. Usually, it was inserted into the index.rst document. The rules of what filename been included in the auto generated toctree table are:
- All the documents with suffix .rst in the same folder of this document. Even the document is not binding to a file in the Github.
- If a document is binding to a file in the Github, the filename will be used. Even the source document is not with suffix “.rst”.
- The current document is excluded. This is for preventing from falling into an infinite loop while the RTD parsing this table. You should add it back manually if that makes sense for you.
Here is an example of what it looks like:
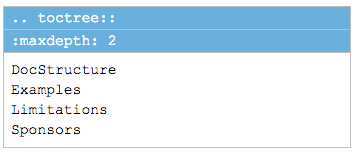
Please be noted the file suffix (.html or .rst) has been omitted. Also, you have to change their order manually. You have to manually edit the list content in the 3rd row when you add or remove your documents. Maybe you can just ask the GGeditor to generate a new doctree table and remove the existing one. You can refer to the source document of the index.rst of the GGeditor for an example.
Raw HTML
This is a handy feature for you to embed html tags into the generated reStructuredText file. This button will insert a table into the document. Then you can put HTML tages in the table. The GGeditor will convert the table content to a “.. raw:: html” directive.
Headings
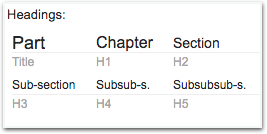
The headings construct the structure of the document. If you put the cursor in a paragraph you can set the heading for that paragraph with this panel. You can click on the upper parts (like Part, Chapter) or use the native heading tools of the Google Docs. The lower parts of this panel shows the relative headings in the Google Docs.
Text Style
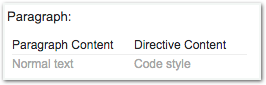
By putting the cursor in a paragraph you can change the text style of that paragraph. The Paragraph Content is for normal text, Directive Content is for code style (monospace). These two are usually used when you paste stuffs from other browser pages into your document.
Upgrade all headings
All the paragraphs with headings will increase one level of heading. That is, Heading 2 becomes Heading 1, and Heading 1 becomes Title. Heading 6 becomes Heading 5. Title keeps Title.
This is useful when you dealing with depth level about what will be listed on the sidebar of your project site in the RTD.
Downgrade all headings
All the paragraphs with headings will decrease one level of heading. That is, Heading 1 becomes Heading 2, and Title becomes Heading 1. Heading 5 becomes Heading 6. Heading 6 keeps Heading 6.
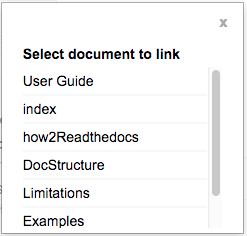
Add link to another document
Add a link of markup to other Google Docs document for selected text. Once clicked, a list of name of Google Docs will be prompted for your choice. Like this:
Please be noted:
- only files in the same folder of the current document will be listed.
- The Google Docs does not allow relative URL, so the added URL will be a pseudo-URL which starts with “http://cross.document/”, please keep the pseudo header when you are manually editing it. The pseudo-URL will be converted to relative-URL when generating the reST.
Commit to Github
Binding the document to a file in repository
You can provide your account credentials for binding the document to a file in the Github repository. Here is the process diagram:
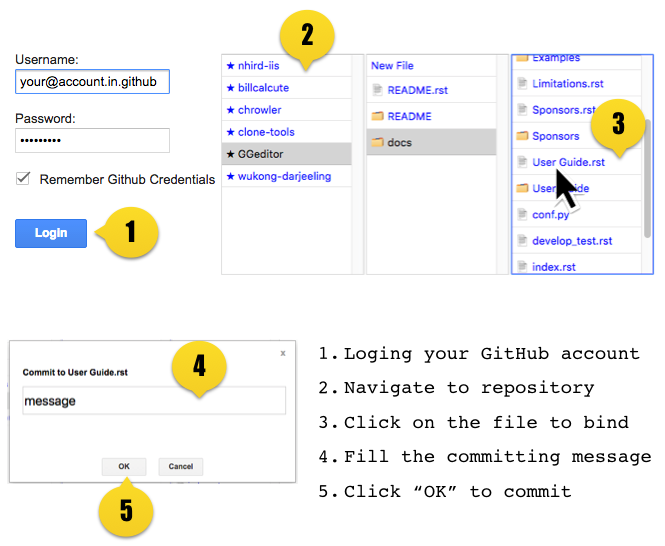
If you want to commit to a new file. Please
- Navigate to the folder where the new file would be
- Click on the “New File” item
- Give the file name to create. The name will be suffix with “.rst” automatically.
Hint
While doing any clicking, ONE click is enough. No need to do “Double-Clicking”.
Committing
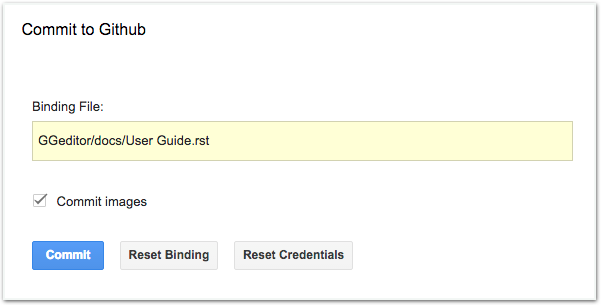
Once you have build the binding, next time you can use the “Commit” button directly to commit. You can reset the binding in this dialog too.
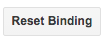
The “Rest Binding” is for rebinding the file in Github repository with this document.
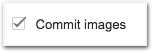
If only the text content has been modified, you can un-check the “Commit images” to exclude images from committing. This would speed up the committing process.
Note
The GGeditor will maintain image files it uploaded to the Github repository while committing. If you modified any image, no matter adding, replacement or deletion, you should check “Commit images”.
Attention
If you have a fat document like this one “How to User”, which has lots of images to upload, you might experience broken images in its corresponding html page in your RTD web site. It is because the RTD re-generating the html when uploading is still ongoing. In that case, you have to wait longer for the RTD to release its lock of building or enforce the RTD to build again from your administration page.
By the way, if you see an obsoleted image the reason might be that the RTD set cache time longer. In that case, you can clear the browser cache or check the Github repository for figuring what happened.
About the Credentials
Given credentials is encrypted and kept in the Google App Script platform. None cloud server is built by the GGeditor.


Credentials is optional. You can un-check the “Remember Github Credentials” check box or the “Reset Credentials” button to clean up the stored credentials.
Caution
The GGeditor will never sent you email to request reset credentials or anything else.
Conversion
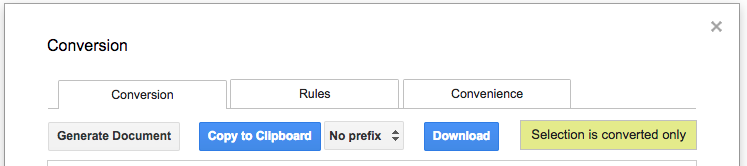
When you open the conversion dialog, the conversion process will be starting. When the conversion has completed, you can copy the generated reStructuredText content to clipboard by “Copy to Clipboard” button, or download the generated reStructuredText content as well as images by the “Download” button.
Conversion Rules
What been converted depends on selection and the cursor position, rules are:
- If there are selections, the top elements of every selected one are converted. Which means if a paragraph is partially selected, whole the paragraph is converted.
- If there is no selection and the cursor is in a table, that table is converted
- Otherwise, the whole document is converted
The conversion message on the right side are indications. There are three kinds of message:
 Means the whole document is converted to the reStructuredText format.
 Means only the table where cursor positioned was converted to the reStructuredText format. (partial conversion)
 Means only the selection was converted to the reStructuredText format. (partial conversion)
Why Partial Conversion
The idea for partial conversion is mainly for creating comments in a source code. In your source code scripts, you can have comments for functions, classes, modules, packages in reStructuredText format. The RTD can automatically generate API documents from source codes. This “How to Create API Docs” has more.
Copy to Clipboard

(This feature is specially for API writers, so it is only visible for partial conversion)
This button will copy the generated reStructuredText to system clipboard (pasteboard). For convenience to paste as a block of comment in source code, you can assign a prefix for every copied line. The options are:
| Options | Note |
|---|---|
| No prefix | |
| # | Python |
| * | Javascript, C++, Java, … etc |
| // | Javascript, C++, Java, … etc |
| Ask | whatever you say |
Dowload

What been converted depends on selection and the cursor position, rules are:
- When partially converted, a <document-name>_selection.zip or <document-name>_table.zip will be created with the partially generated reStructuredText content and images (if any).
- If whole document is converted, a <document-name>.zip will be created with whole generated reStructuredText content and images (if any).
Generate Document
When partial content is converted only, like table or selection, The “Generate Document” button appears. Users can click this button to enforce the whole document is converted.
Settings
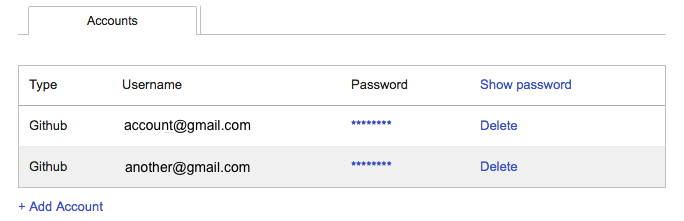
Accounts
The GGeditor supports multipe Github accounts. You can select the account to use when committing converted reStructuredText to the Github for every single document. This panel is where you manage these Githubs accounts.
Document Preferences
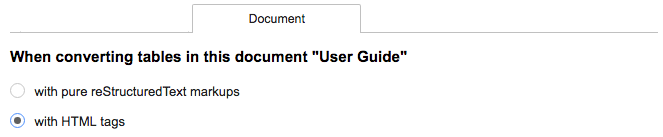
When converting tables in this document
You have two options.
“with pure reStructuredText markups” would convert table in pure reStructuredText syntax. This is the default behavior.
“with HTML tags” would generate table with HTML <TABLE>. This option is useful for those who utilizes the readthedocs.org as a blog system. Please refer to this document for details.